


What you’ll need
- Drop sheets
- Dust mask, work gloves and goggles
- Scraper
- Spray bottle with water
- Bonding and sealing agent
- Carrying board (to hold plaster)
- Plaster
- 100mm and 150mm broadknives
- Sanding block
- Primer and paint
- Filling knife
- Sanding float and abrasive paper
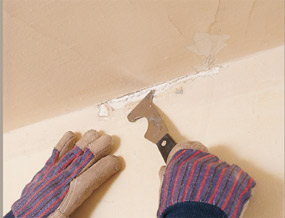
STEP 1
To repair a plaster crack, first move furniture out of the area and put down drop sheets. Wearing a dust mask, eye protection and work gloves, rake out any
loose material with a suitable scraper.

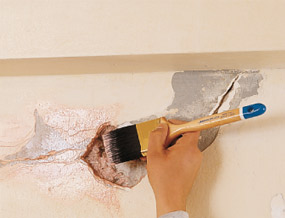
STEP 2
Dust the inside of the crack and lightly mist with water; wait until it’s absorbed. Mix a bonding agent; let dry. Apply the plaster and fill the hole. Sand when the plaster is completely dry. Spot-prime and paint.
STEP 3
To repair a hole, remove any loose or crumbling plaster with a scraper. Dust inside of the hole and mist with water; wait until it’s absorbed. Apply a bonding agent, and allow about 45 minutes to dry
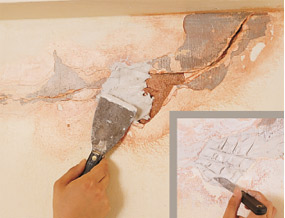
STEP 4
Using a 100mm broadknife, fill the hole with plaster from the centre out to a depth just below the wall surface. Before the plaster sets, scratch surface with a filling knife to create a crosshatch pattern. Let dry.
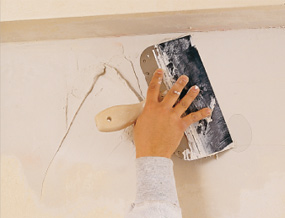
STEP 5
Using a 150mm broadknife, apply a finishing coat (use skim-coat if available). Check wall is level and smooth. If necessary, apply another thin coat of plaster. Sand lightly with medium abrasive paper.


